ASALAMUALAIKUM WR WB
How terrible when a fault had made. It was happen to me when perform flashing to
NOKIA 6120c RM-243. Little lucky was i have backup phone first before do that, but it wasn't help any.
The trouble come after flashing complete that can't read any phone info and so u.i settings. The phone can't go to Localmode state.
This can happen because i don't look at the firmware version when still can checking for phone info before flashing. This can be happen when doing a downgrading BB5 phones[no matter i do not know that]. That was the problem out of my sight. For you who have the same trouble as i have, now you can fix it through my way.
What we need is original complete firmware package in installshield.exe form, you can torrent this from support saruna software for UFS users
Download both type of firmwares:
these packages have 7.20 firmware version
You will lucky if you have your region on both packages. Cause i haven't. But don't worry if you don't.
First need to install is rm-243_CareDP_41.0_APAC or as your region, next upgrade it to rm-243_CareDP_41.1_APAC.
This the log after fault flashing:
CMT NAND Erase Area: 0x04E00000-07B3FFFF
CNT FLASH ERASE OK, Time: 00:00
CNT FLASH WRITE OK, Time: 00:01
Flashing Completed, Rebooting Mobile
Set UI Factory Defaults ...
Set UI Factory Defaults Failed
Init Local Mode Failed
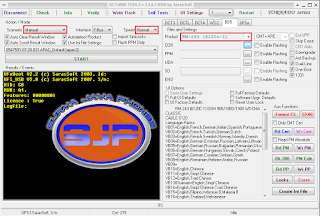
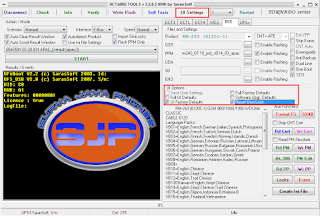
Some settings on Scenario and Speed are optional but i'm prefer doing these.
Open product and choose RM-243, click browse to locate the firmware one by one
Add whatever language exist if you don't have your region in the firmware, we gonna change this after flashing finished successfully. Then hit
Write Flash
log:
1ST BOOT : C0,07 [Rm-243] [2.2.0.3]
CMT ASICID: 000000010000022600010006400C192101031103
EM 1 ID : 00000296
EM 2 ID : 00000B22
CMT PUBID : 1F7000085EE80152563466D39E649FABAADE9A30
CMT MODE : 00
CMT HASH : CAEEBB65D3C48E6DC73B49DC5063A2EE
CMT ROMID : 4B9B75103E691FF8
CMT 1ST Boot OK
CMT 2ND Bt: RAPIDOv11_2nd.fg, Ver: 1.37.1
CMT FLID0 : 00EC0030-00400321, Sam OneNAND-1G
CMT FLCNT : 00030000000000000000000000000000000000
CMT MCID0 : FFFF0000-00000000
CMT 2ND Boot OK
CMT ALGO : RAPIDOv11_algo.fg, Ver: 1.40.0
CMT KSIG0 : 0FE1BA92D924A658E4800780FA6F4868100AC947
CMT VPP : Internal
DUAL LINE : True
CMT ALG Boot OK
PASUBTOC : PA_SL2
Rebooting Mobile
MCU File: rm243_07.20_prd_core.fpsx
1ST BOOT : C0,07 [Rm-243] [2.2.0.3]
CMT ASICID: 000000010000022600010006400C192101031103
EM 1 ID : 00000296
EM 2 ID : 00000B22
CMT PUBID : 1F7000085EE80152563466D39E649FABAADE9A30
CMT MODE : 00
CMT HASH : CAEEBB65D3C48E6DC73B49DC5063A2EE
CMT ROMID : 4B9B75103E691FF8
CMT 1ST Boot OK
CMT 2ND Bt: RAPIDOv11_2nd.fg, Ver: 1.37.1
CMT FLID0 : 00EC0030-00400321, Sam OneNAND-1G
CMT FLCNT : 00030000000000000000000000000000000000
CMT MCID0 : FFFF0000-00000000
CMT 2ND Boot OK
CMT ALGO : RAPIDOv11_algo.fg, Ver: 1.40.0
CMT KSIG0 : 0FE1BA92D924A658E4800780FA6F4868100AC947
CMT VPP : Internal
DUAL LINE : True
CMT ALG Boot OK
IMAGE : rm243_07.20_prd_core.fpsx
CMT NAND Erase Area: 0x00040000-00082FFF
CMT NAND Erase Area: 0x00083400-0087FFFF
CMT NAND Erase Area: 0x00B80000-04DFFFFF
CMT NAND Partition Format
CMT FLASH ERASE OK, Time: 00:00
Written: 11 Certificate(s)
CMT FLASH WRITE OK, Time: 03:53
IMAGE : rm243_ENO_A_2009wk15v0.100.fpsx
CMT NAND Erase Area: 0x00880000-00B7FFFF
ENO FLASH ERASE OK, Time: 00:00
Written: 1 Certificate(s)
ENO FLASH WRITE OK, Time: 00:07
CNT File: rm243_07.20_prd_UDA_Pearl_White.fpsx
IMAGE : rm243_07.20_prd_UDA_Pearl_White.fpsx
CMT NAND Erase Area: 0x04E00000-07B3FFFF
CNT FLASH ERASE OK, Time: 00:00
CNT FLASH WRITE OK, Time: 00:01
PPM File: rm243_07.20_prd_vB15_01_apac2.fpsx
IMAGE : rm243_07.20_prd_vB15_01_apac2.fpsx
CMT NAND Erase Area: 0x03300000-04DFFFFF
PPM FLASH ERASE OK, Time: 00:00
Written: 1 Certificate(s)
PPM FLASH WRITE OK, Time: 01:40
Flashing Completed, Rebooting Mobile
After flash finished again hit
Check button then hit
Info, both should be work now. Next delete all firmwares data has written.
Uncheck them all.
Next add only PPM file that support your region language, i use a
PPM comes from
Data Package Manager download for
rm-243 apac1. You can also using
Navifirm plus to have it firmware. If it OK next press
Write Flash.
log:
1ST BOOT : C0,07 [] [2.2.0.3]
CMT ASICID: 000000010000022600010006400C192101031103
EM 1 ID : 00000296
EM 2 ID : 00000B22
CMT PUBID : 1F7000085EE80152563466D39E649FABAADE9A30
CMT MODE : 00
CMT HASH : CAEEBB65D3C48E6DC73B49DC5063A2EE
CMT ROMID : 4B9B75103E691FF8
CMT 1ST Boot OK
CMT 2ND Bt: RAPIDOv11_2nd.fg, Ver: 1.37.1
CMT FLID0 : 00EC0030-00400321, Sam OneNAND-1G
CMT FLCNT : 00030000000000000000000000000000000000
CMT MCID0 : FFFF0000-00000000
CMT 2ND Boot OK
CMT ALGO : RAPIDOv11_algo.fg, Ver: 1.40.0
CMT KSIG0 : 0FE1BA92D924A658E4800780FA6F4868100AC947
CMT VPP : Internal
DUAL LINE : True
CMT ALG Boot OK
PASUBTOC : PA_SL2
Rebooting Mobile
MCU SW : V 07.20 05-10-09 RM-243 (c) Nokia
PPM SW : 07.20
Product : Nokia 6120
Prd.Code: 0552627
Bpr.Code: 0548116
Prod.Sn : MAN131813
HW Vers : 1103
EM VILMA: 16
EM BETTY: 22
RFIC Ver: 17141716
DSP Vers: 06w41pb_08w28.0.3_rm243
IMEI : XXXXXX-04-XXXXXX-9
SL Serv : SIMLOCK SERVER
SL Conf : 244-07-00000000000
SL Prof : 0000000000000000
SL Count: 00 00
SL Data Read Failed
BLK1= L1: OPEN L2: OPEN L3: OPEN L4: OPEN L5: OPEN
BLK2= L1: OPEN L2: OPEN L3: OPEN L4: OPEN L5: OPEN
BLK3= L1: OPEN L2: OPEN L3: OPEN L4: OPEN L5: OPEN
BLK4= L1: OPEN L2: OPEN L3: OPEN L4: OPEN L5: OPEN
BLK5= L1: OPEN L2: OPEN L3: OPEN L4: OPEN L5: OPEN
BLK6= L1: OPEN L2: OPEN L3: OPEN L4: OPEN L5: OPEN
BLK7= L1: OPEN L2: OPEN L3: OPEN L4: OPEN L5: OPEN
Provider: Nokia Test;Finland
CNT File: rm243_07.10_prd_vB14_03_apac1.fpsx
1ST BOOT : C0,07 [Rm-243] [2.2.0.3]
CMT ASICID: 000000010000022600010006400C192101031103
EM 1 ID : 00000296
EM 2 ID : 00000B22
CMT PUBID : 1F7000085EE80152563466D39E649FABAADE9A30
CMT MODE : 00
CMT HASH : CAEEBB65D3C48E6DC73B49DC5063A2EE
CMT ROMID : 4B9B75103E691FF8
CMT 1ST Boot OK
CMT 2ND Bt: RAPIDOv11_2nd.fg, Ver: 1.37.1
CMT FLID0 : 00EC0030-00400321, Sam OneNAND-1G
CMT FLCNT : 00030000000000000000000000000000000000
CMT MCID0 : FFFF0000-00000000
CMT 2ND Boot OK
CMT ALGO : RAPIDOv11_algo.fg, Ver: 1.40.0
CMT KSIG0 : 0FE1BA92D924A658E4800780FA6F4868100AC947
CMT VPP : Internal
DUAL LINE : True
CMT ALG Boot OK
IMAGE : rm243_07.10_prd_vB14_03_apac1.fpsx
CMT NAND Erase Area: 0x03300000-04DFFFFF
CNT FLASH ERASE OK, Time: 00:00
Written: 1 Certificate(s)
CNT FLASH WRITE OK, Time: 02:19
Flashing Completed, Rebooting Mobile
log:
Set UI Factory Defaults ...
Set UI Factory Defaults Ok, Time: 00:01
Set Security 12345 ...
Set Security Ok, Time: 00:00
All that means the phone can go to Localmode state and completely back to normal
wasalamualaikum wr wb
Arek NGAJUM IsoIso Ae [ The Fully Fuckin' Headache Lion ]


![FlashTool v0.9.11.0 New Update XPERIA Flasher By Androxyde [05062013] Flashtool Xperia v0.9.11.0](https://blogger.googleusercontent.com/img/b/R29vZ2xl/AVvXsEj0TwthWWdlTcvpPCR1CfcN9gWxQaErkL0QA-X4Uvr-1BX9dzqzF2GiE7zcCpdzMDoVqveRIjE2S3NF-1ATR_oTWhmxO7IpwogM8PElInFWm7gjOzte1dmhwBSMCgLameQXdERbwnXJtbw/s320/ft910.JPG)


