Monday, August 29, 2011

Autorun Virus Remover3.1 Build0422


       Does your antivirus can't remove the autorun & autorun.inf virus in your system or USB storage device completely ? or even they can't detect the virus ? Autorun & autorun.inf virus is a new kind of virus/trojan. Most of common antivirus products such as Kaspersky, Nod32, Avast, AVG can do little about this kind of virus/trojan.
Autorun Virus Remover uses proactive technology to permanently remove autorun & autorun.inf viruses, also it can block any autorun/autorun.inf viruses trying to infect the system via USB drives ( pen drive, external hard disk, iPod, etc ).
What you need to do is just clicking the scan button of Autorun Virus Remover.

Key Features :

1. Permanently remove autorun virus in your system and USB drives.
2. Prevent autorun virus infecting computer from USB drives.
3. Prevent data leak via USB storage devices.
4. The best solution to protect offline computer.
5. Compatible with other antivirus.
6. No recurring payment the license key is lifetime.
7. Support all kinds of external removable media :
     - Pen drives                                          - USB audio players
     - USB flash cards                                 - USB sticks
     - USB MP3 players                              - External hard drives
     - Pocket PCs                                        - Mobile phones
     - iPod and iPhones                                - Other USB mass storage enable devices

Download HERE !!!

Wassalamualaikum warahmatullaahi wabarakatuuh...

Arek NGAJUM IsoIso Ae

XoftSpySE

XoftSpySE, an anti-spyware program made by Pareto Logic.inc, is simple, but effective on-demand scanner with the typical set of functions. The product does not rise above similar products. It does not even provide real-time protection. Nevertheless, it manage  to detect almost any kinds of spyware, adware and hijackers, including new rapidly spreading parasites.
       XoftSpySE was noticeably improved in comparison with XoftSpy, the previous version that have tested long time ago. The new product does not miss threats and actually removes found parasites.
       The program scans the Windows Registry running processes, files and folders on all local drives. It can perform full system scan or check only certain user defined locations. XoftSpySE uses large spyware definition database which currently includes almost 43.300 pest signatures, it is update on regular basis. The program provides detail information on each detected objects. It shows the parasites location. Its author, type and danger level.
       XoftSpySE includes helpful functions for the Internet Explorer default safe settings, and prevent browser hijacks.
       The applications scan engine is reliable, but relatively slow. Full system scan on a regular modem computer can take up to 45 minutes. Selective scans are much quicker but less thorough. The program has a simple, clean and quite attractive interface.
       The free version refuses to remove any malware it finds. It asks to register and purchase the full product.
The official website is www.paretologic.com Order are made VID reputable services using secure connection.

Download free version HERE
Download full version HERE

Installation guide for full ver :
1. Download and extract file
2. Double clicks on XoftSpySE.Anti-Spyware.v6.0.Full
3. Then will show picture above, click on "Wld-Otiba" to installing the program
4. See on your desktop for XoftSpySE icon. if there is XoftSpySE icon existed that means installation completed. Close the window above and reboot your computer
5. Open your internet connection, then run XoftSpySE for the first time its will automatically downloading its new version, wait untill finished and close after finished
6. Re-run XoftSpySE for the new full version, good luck and enjoy it

Wassalamualaikum warahmatullaahi wabarakatuh...

Arek NGAJUM IsoIso Ae

DivX Plus 8.1.2 Build 10.2.1.20

Generasi baru dari DivX, untuk memutar video DivX, AVI, MKV, MOV dan video MP4 menggunakan program pemutar video yang kita miliki. Atau menonton video ini di pemutar populer lain seperti Windows Media Player atau Media Player Klasik. Pembelian DivX Pro untuk membuat video HD sendiri. DivX adalah format video yang menawarkan tampilan berkualitas tinggi pada setiap perangkat atau platform pc ke perangkat telefon atau ke televisi di ruang tamu anda.
Lebih dari 100 juta perangkat yang menggunakan atau mendukung DivX video telah dikirimkan ke seluruh dunia dari manufaktur besar, termasuk diantaranya pemutar DVD, konsol game, ponsel dan banyak lainnya. DivX memberi anda kenyamanan dalam menonton, membuat dan berbagi video berkualitas tinggi pada Windows atau Mac Computer.
Teknologi DivX memungkinkan video terkompresi sangat tinggi tanpa mengorbankan kualitas sehingga anda dapat menikmati pengalaman sinematik pada komputer anda, di ruang tamu anda atau kemanapun anda pergi.
       H.264 adalah standart baru yang siap untuk menyalakan video devinisi tinggi dengan menawarkan kualitas kinerja yang luar biasa, visual dan efisien. DivX 8 Author memberikan anda semua alat yang anda butuhkan untuk mengambil keuntungan penuh dari H.264 untuk pengalaman video sinematik yang sesungguhnya.
@ Mengkonversi video anda termasuk video HD, untuk video DivX dengan menggunakan DivX converter, atau mebuat kompilasi video dengan fitur DVD menggunakan DivX Author
@ Pasang video DivX ke situs anda menggunakan DivX Web Player.
@ Menonton video, bahkan HD video ( H.264, AAC ) dari internet menggunakan DivX Player
       Teknologi DivX memungkinkan anda mengambil video berkualitas tinggi dari komputer anda dan memutar nya dalam modus layar penuh pada layar TV di ruang tamu anda. Gunakan salah satu dari jutaan perangkat DivX Certified, seperti Blu-ray DVD Player, konsol game atau perangkat DivX connected, untuk menonton video anda secara langsung pada pesawat TV anda.
@ Streaming video, foto, musik dan video internet ( mis. YOU TUBE ) ke TV anda dengan DivX connected.
@ Membakar video ke disc untuk diputar pada DVD player bersertifikat DivX.
       Dengan perangkat seluler bersertifikat DivX anda dapat menonton video DivX berkualitas tinggi, dan bahkan merekam yang baru kemanapun anda pergi.
@. Menonton video pada ponsel anda dimanapun anda berada.
@ Rekam video dari kamera atau ponsel bersetifikat DivX
@ Berpergian dengan gaya dengan pemutaran video DivX menggunakan peutar video portable atau media player pada mobil anda dengan perangkat bersertifikat DivX.

Fitur: 
        1. Plays DivX video ( divx,...rar )                    
        2. Play HD H.264 video (.rar)
        3. Support AAC and MP 3 audio
        4. Includes DFX video enhancer

Create:
        1. One-step conversion to DivX video
        2. Outputs .divx,.avi, .mkv files
        3. Includes DivX Plus HD encode profile
        4. Includes advanced encode setting

       DivX Pro 8 Premium untuk Windows adalah perangkat lunak DivX yang ditawarkan, memberikan semua yang anda butuhkan untuk pengalaman HD yang sesungguhnya. Memanfaatkan video terbaru dan teknologi terbaik bedasarkan H.264, standart baru untuk video HD. DivX Pro 7 memungkikan anda mebuat video HD dan memainkan MKV dengan kualitas audio AAC. Anda juga dapat memutar file DivX ( .divx, .avi ) pada jutaan perangkat bersertifikat DivX saat ini. Carilah perangkat HD bersertifikat DivX yang akan mendukung semua pemutaran file DivX dan DivX Plus, serta .rar ( H.264 ) video dari internet.

       DivX Plus Codecs Pack :
       - Play high-quality video with DivX codec
       - Watch divx, avi, mkv and MP 4 videos in popular media player
       - Stream your MKV videos to your game console ( Using Windows 7 )

      DivX Plus Converter :
       - Convert your video to DivX or MKV in one step
       - Create high definition MKV videos for free
       - Backup personal DVDs with the additional MPEG 2/ DVD plug-in

      DivX Plus Player :
       - Play DivX, AVI, MKV, MP4 and MOV videos
       - Transfer video to your devices with DivX To Go
       - Navigate your videos with greater and precision

      DivX Plus Web Player :
       - Watch DivX, AVI, MKV videos in your web browser
       - Experience stunning 1080p video with 5.1 channel surround sound
       - Enjoy multiple audio tracks and subtitles

      DivX Plus 8.0 for Windows includes :
        - DivX Plus Player 8.0
        - DivX Plus Web Player 2.0
        - DivX Plus Converter 8.0
        - DivX Plus Codec Pack 1.0

Download dari situs resmi ( free Trial )
        http://www.divx.com/en/software/divx-plus

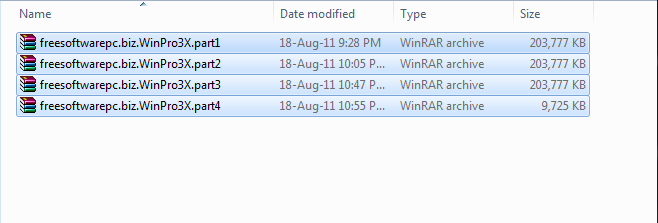
Download versi full include key maker
        Disini/Click Here
        Password : freesoftwarepc.biz

Selamat mencoba dan semoga sukses
Wassalamualaikum warahmatullaahi wabarakatuh


Sunday, August 28, 2011

Nokia DCTx Tool Button And Functions ( UFSx Tornado )

      Here is the explanations the buttons function  on NOKIA DCTx Tools on UFSx Tornado. Using The DCTx BB 5 Icon you'll found all the buttons below. Did you ever had the same explanation like this before, or you still confusing how to use them on your tasks. Let's talk about them by now.


LIST OF THE FUNCTIONS BY NUMBER ON SCREEN :

1. Check >>> to check the flash mode
2.  Info >>> to check the functinality of M/F Bus ( Use this to confirm a good connection )
3. Flash >>> to be use for manual flashing mode
4. UI Setting >>> User interface setting
5. Phone Mode >>> Local mode, Test mode, Normal mode
6. Restart >>> Retart the phone
7. Phone Type >>> Choose between the different platforms, DCT 3/4, WD2 or BB5
8. BT HW >>> manually choose the  Bluetooth hardware, recommended to choose Auto
9. Write The User Setting Back >>> Phone book etc
10. Aux Option >>> Read/Write PM-UEM, Erase Flash ( don't do this if you don't know what you do ), Format User Area.
11. Progress bar >>> Box Serial, Counter, Flash progress
12.UI Option >>> resets, sim lock, security code, factory default, software upgrade default
13. Flash file browser >>> Choose your flash files
14. Start/Stop Button >>> Execute/Terminate selected job
15. Special Setting >>> Relock function, manual flashing, Language update only etc
16. Connection Bus & Flashing Speed >>> Adjust the flashing speed and the choose the bus
17. Pre-Setting >>> Choose the job to be done
18. Progress Window >>> Phone details, Box status and other User information
19. Caculator >>> to calculate network unlock code ( only apply on DCTx, UFSx 1.3b )
20. Support >>> for product support website ( www.sarunasoft.com )


QUICK BUTTON


1. CONNECT/DISCONNECT :
      First you have to press "Connect" button to connect software module with the UFSx box hardware. Without this connection you cannot use any software modul with UFSx box.
2. CHECK :
      You can test Flash mode with this button.
3. INFO :
      You can test the connection Bus ( F Bus or M Bus ) and read Info from your phone, it is recommended to use this to check the cables and establish a good connection.
4. FLASH :
      The Flash button can be used for manual flashing, if for example the phone is dead.
5. UI SETTING : Manual option to execute predefined user interface setting
      [?] : This drop down box lets you manually choose between normal mode, test mode or local mode on the phone.
6. AUTO DETECT :
      Use this option if you are not sure of whwt kind of phone it is, it will auto detect for you.
7. AUTO CLEAR RESULT WINDOW :
      Will clear all result displayed in main window when/after commencing each function.
8. USE INI SETTING :
      You should use this function if you have already prepared a specific INI file for desire type of phone. It is the fastest way if you have many phones with the same type of job to do.
9. IMPORT SIMLOCKS :
      Importsimlock from file when do init simlock.
10. FLASH PPM ONLY :
      This option is to flash only the PPM ( Language Packs ). It is the fast way to change the available language, however take care that you are using the PPM version witch match with MCU version currently in the phone. Otherwise you'll get "CONTACT SERVICE" or some unexpected fault in which case you will need to full flash the phone.
NOTE : if you want to flash PPM only, before you do anything check the software version of the phone or connect it to the UFSx & click on info to get the version. Then choose the same version of PPM and flash the phone to avoid any fault in the phone.
11. INTERFACE :
      Communication settings, you shuld use F-Bus: for all DCT 4 and WD 2 phones use M-Bus
12. SPEED :
      ( FLASHING SPEED ) you can keep default FAST but if you get errors, you should choose NORMAL or SLOW since not all flash type support fast flashing.
13. START/STOP BUTTON :
      To Start or Stop the job that you do.

DCT-4 FLASHING METHOD :
1. PRODUCT : choose your phone model
2. MCU : choose MCU file ( main phone firmware to be flash ), use higher version
3. PPM : choose PPM file ( Language pack firmware must match with MCU version )
4. CNT : choose CNT file ( CNT= content file ). This allow you to flash the standard factory wallpapers, ring tones, games and others applications supplied as standard in the hand set.
5. PM : PM ( permanent memory ). This is the DCT-4 version of "EPROM" but cannot change and reset easily. ( DO NOT PLAY WITH THIS ; YOU MAY DAMAGE YOUR PHONE! )
NOTE : if you know what you're doing then you can play with PM
6. ENABLE BT FLAASHING : Flash the BLUETOOTH firmware ( BT : Bluetooth )
    BT HW : you can choose AUTO, OLD or NEW. Default is AUTO, however in some cases such as some 7650 it is necessary to use OLD option in BT function does not work correctly.
7. UI OPTION : You can double click these items to execute each one individually and immedietly.
8. SAVE USER SETTING : You can save/backup main user before starting do any job with the phone.
9. FULL UI DEFAULTS : set user setting to the defaults ( phone setting etc )
10. FULL FACTORY DEFAULTS : Set the phone to the factory defaults settings, including restting the wakeup graphics, security code, phone books etc
11. SOFTWARE UPGRADE DEFAULTS : This should be done when you have UPGRADED to newer Software version.
12. INIT SIM LOCK : Unlock SP Lock/ Network Lock.
13. RESET USER LOCK : Set the user lock ( Security Code ) to factory default "12345".
14. REBOOT IN NORMAL MODE : You can insert sim card after processing, the phone will reboot into normal operating mode. Please not that many USB ports cannot supply enough power to phone to transmit, so the phone may shut down when trying to register with the network when using this feature. It is mainly to confirm the phone will power ON and accept the SIM CARD etc

USER SETTING ITEMS :
      1. Phone Book : Save Phone book
      2. UI Setting : Save UI setting
      3. Ringing Tones : Save ring tones
      4. Graphic Logos : Save Logo and graphics
      5. Write User Setting : Write back saved data

AUX FUNCTIUON :
      1. Read UEM : Create an *.ASK file
      2. Write UEM : Write a *.RPL file
      3. Write PM : Write a PM file
          NOTE : Please do not do experiments with this function, you may damage your phone. If you know what you are doing then you can play with this PM. PLAY AT YOUR OWN RISK.
      4. ERASE FLASH : Erase whole flash!!!
          NOTE : All flash will be erased, iinclusive the PM area, you may damage your phone!!!
      5. CREATE INI FILE : Create .INI file to be used with "UI Option". Create INI file is to make easy for you it means after you have choose the setting, MCU, PPM, UI Setting then click CREATE INI. Next time when you want to flash for the selected models for which you have already created the .ini file. You don't need to select MCU, PPM etc what you do is just click flash or start.


Thank you very much for all attentions to this blog,
Greatest thanks to ALLAH SWT
ATS Communication
iPmart
D3 dedy kusmayadi
Djawir
LPTTI
GSM Forum
SCPGSM
D2 Computer
setool.net
N-BOX org
Symbian tech
All the readers follows this blog for informations

Saturday, August 27, 2011

UFSx Tornado Common Problems & solutions part 2

Problems and solutions on DCT 4

Problem : ' 1st Boot Err: Bad Resp UPP, 0X FF FF 72 '

This error says taht box cannot communicate with Phone via Flash-Bus interface. Do all steps as described in ' 1st Boot Err: Bad Resp DCT 3' topic.
Here 0X in response string gives some information:
                                                                                       
                   1. Mobile not Powering Up
                   2. Mobile not entering flash mode
                   3. UPP not respond

NOTE: DCT 4 Phones must start in ' LOCAL ' mode when powering up

Problem Erasing or Flashing fails in the middle of process

                   1. Check cable, especially BSI wire ( RJ 45 Pin (<_>) Dummy battery)
                   2. Try slower Flash-Bus speed

Problems and solutioan in DCT 4 WD 2 (Symbian) Phones

Problem ' Contactc Retailer...' or blinking 'NOKIA' on LCD

Warning !!!: Never do 'UI Factory Defaults', 'Full Factory Defaults', and 'Software Upgrade Defaults'. Use these functions only when the Phone fails.

                    1. Do 'Full Factory Defaults'
                    2. Switch Phone to 'NORMAL' mode ( Can fail here )
                    3. Switch Phone to "LOCAL' mode
                    4. Do Format User Area
                    5. Switch to 'NORMAL' mode
                    6. If Fail repeat step 1-4, check if match MCU and PPM software version

Note : WD2 phones Booting is slow, so please be patience here, and don't do these steps fast. If Phone doesn't Enters 'LOCAL' mode when connected or after Flashing, please check cable with schematics ( BSI Wire ) here must be serials Resistor on BSI ( 3.3 Kohm )

Here described are only most frequently common errors
                                                                                         
NOKIA 6600 MCU, PPM, BT, FORMAT step by step
                     1. Select the MCU and PPM files, speed choose "NORMAL"
                     2. Press "Start" button to do the job
                     3. When Flashing is done, choose "NORMAL" in UI Setting, after that can see the "Init Normal Mode OK" in the software.
                     4. Choose "LOCAL" mode in UI Setting, after that can see the "Init Normal Mode OK" in the software
                     5. Press the "Format User Area" button, after that can see the "Format USer Area OK" in the software
                     6. Done


3650 CONTACT RETAILER

      Manage by this way :
                      1. Flash Phone ( MCU & PPM selected/use higher version ) with speed set to 'NORMAL', UI option set to 'full factory'. Do not use .ini setting and disable Auto detect.
                      2. Power Up phone, phone says 'contact retailer'
                      3. Put in 'NORMAL' mode
                      4. Format user area gives error "cannot format"
                      5. Put in 'NORMAl' mode phone resets with insert sim card tested-phone 100% working with full signal..

Simple solution for 6600 "Contact Retailer" or "4Blinks"

        Step 1 :
                      a. Click Erase Flash
                      b. Start Address: 02000000
                      c. End Address : 027FFFFF
NOTE: If you get an "Erase Flash Error" message in a specific address in the FLASH IC, this means that you have a DAMAGED FLASH IC. You will need to replace flash IC number 2 inside the phone. ( The 6600 has 4 Flash ICs inside ).

        Step 2 :
                       If you are successful in erasing Flash IC number 2, make full flash of the phone...MCU, PPM, Bluetooth If required.

         Step 3 : If you are successful in full flashing the phone, put battery inside the phone and you SHOULD GET " Contact Retailer " message again. Then remove the battery and put it back then press and hold "CALL" button + " * " button + "3" then press the power button while still holding the 3 buttons above.
The phone should start FORMATING itself ( NOTE :there must be no sim card inside the phone while doing this )

After formatting, phone should be OK... but need to update a good PM file if necessary.

FINISH 

Wassalamualaikum warahmatullaahi wabarakatuuh

Arek NGAJUM IsoIso Ae

Friday, August 26, 2011

UFSx Tornado Common Problems & Solutions

I. UFSx Tornado DCT3 problems & solutions

Problem, "1st Boot Err: Bad Resp DCT3"

This error says that box cannot communicate with the phone via Flash-Bus interface

Solutions:
              1. Check cables by schematics, use 'beeper' here to make all wires are 100% connected and well crimped.
              2. If you have this error on 5110, 6110, 6200, 7110 phones be sure that you are using DCT3 cable, DCT4 (6310) cable has differen schematics and cannot be use with DCT3 phones.
              3. Check if phone can communicate with box via M-Bus ( click "Info" button )
              4. Make sure that box empowering phone, then press "Check" button, left LED power must switch off for 1 second.
              5. DCT3 phones must power up automatically when connected to the box, box must be in DCT3 mode. Also when you click on "Check" it should power up the DCT3 phones. Then switching between DCT3 and DCT4 modes phones must power up.


Problem: " Contact Service" on LCD

This error cause few reasons:
               Firmware checksum error
               1. Try to use slower Flash-Bus speed, not all phones support "FAST".
               2. Did MCU software version match with PMM version?
               3. If 3310 or 3410 phone, did you use last version of DCTx with "Erase" hole option selected.

              PPM area currupted
               1. Make "UI default" and "Set Faid"
               2. Make "Init Simlock"
               3. Make "Rebuild Imei" then repeat steps 1 & 2
               4. If error still present try Flashing PPM area using virgin PMM content ( PPM= Eprom area)
Warning : All original Radio setting, User setting, IMEI will be lost, we highly recommended to backup PPM before ( READ FLASH ). After PMM Flashing must do " Rebuild Imei " and steps 1, 2
             
               Hardware fault :
                1. Check COBBA S/N ( click "Info" ) if number 00000000 COBBA is faulty.
                   ( some patched software also gives COBBA S/N 00000000, Try to reflash )
                2. Defective Flash memory chip
                    Normally this gives erasing or writing error while Flashing
                3. Defective MAD Asic, CCONT Asic.

Problem No Radio coverage :
                1. Always make "Set Faid" after flashing.

To be Continued......

Wassalamualaikum warahmatullaahi wabarakatuuh...


Arek NGAJUM IsoIso Ae


Thursday, August 25, 2011

Hardware Solution Part 1.2

I.2. Signal strength indicator appears but cannot make a call


How to fix:

a. Check the user setting from 'Menu', check whether the setting 'Call setting' and 'Phone setting' are correct. When the phone from BB 5 generation do reset user setting by typing *#7370#. Then type 12345 for code asked if it was never been changed.

b. When the settings have been adjusted but still the same result obtained, do check tx area.

c. Make sure Vtx, tx IC and wiring lines are good.

d. If still gathering same trouble replacing tx IC with a new one

e. Check to searching signal operator using manual search do it several times so you can find any difference case after do that. If there is differences for the result on manual search. It could be a trouble shoot on rx IC. Blow it or replace with new IC if necessary.

f. When all have done and still the same, go to software checking or do re-flash using higher version of firmware. Check PM data and backup first for RPL and 308.


      All posts about signal problems that occur on the phone is the end of the staple explaination in the case of the most common SIGNAL.Hopefully this post gives benefits to all colleagues who have visited this blog. On the next Hardware Solution Part II we will talk about dead phone. So follow the post for each trouble shooting way to resolve the problems.


Wassalamualaikum warahmatullaahi wabarakatuuh..

Arek NGAJUM IsoIso Ae

Wednesday, August 24, 2011

Hardware Solution Part 1

I.1. Signal Problem

      Damage to the area of rx/tx we can see with no appearance of the signal field on the display screen. Indications for this case is with the sim card that had been installed on the phone but not the signal field indicator appears, or with the appearance of the warning " No Signal/ No Network ".

How to fix :
a. Check the connection between the antenna and antenna pad on the PCB of the cell phone. Make sure the connections are both in really good connection.

b. Do signal checking by searching signal manually, if at least 3 operators get, rx works well signify the area. Otherwise if no operator is available or get the operator but only one. This indicate there is trouble on rx area. Do ' REBALL' on rx ic. If the repairs do not result we had to do replacement rx ic with a 100% new.

c. After doing a search using the manual system there is no problem that occure then proceed to check in tx area. Check the signal field using a DC Power Supply "Bakku" that has signal field indicator. Plug the PS output taps to each cell phone batteries connector. Do not forget to install BSI tap in checking your NOKIA. With the sim card that has been installed on mobile phones if there is no problematic  tx amperes PS Bakku needle will go up and stop beating after the signal is obtained, and this was following by blinking indicator lights signal field that existed at PS Bakku. If there are no features such as the above indicates a problem with the tx area. Do a blow on the tx ic. If not manage to replace it with a new tx ic.

d. If the point b and c have carried out but the signal does not also want to come then do the check switc antenna. Replace switc antenna or jumper if necessary.

e. When all has been done but not to fruitful next step to do FLASH the phones, do some preliminary checks on the PM of cell phone and read RPL for backup.

Similarly, discussion a phone hardware problematic at the signals for this time. I'll continue this post next time in some parts. Because of the explanation will give a very long than we do the practice directly. But i hope you following to my posting continuosly even a little knowledge can be gained. Because it's better than nothing at all to give an explanation to all of us.
For the attention of all colleagues NEWBIE i can only express my gratitude profusely.

Wassalamualaikum warahmatullaahi wabarakatuuh..


Arek NGAJUM IsoIso Ae


Monday, August 22, 2011

Tune Up Utilities 2011

      Tune Up Utilities 2011 with serial number free

Don't have this for your PC's, don't worry download HERE for its software free.
What's realy this can do change to your computer, take a while to these review i share to you for all the tab menu function summary.

1. Status & recmmemdation :

a. Maintain system
    - Increase PC performance and stability
    - Save time and its easy to use
                                          - Run as 1-Click Maintenance by pressing a button or as Automatic Maintenance in the background.

b. Increase performance
    - Immediately shows how many tuning recommendations are still waiting to be run
    - With the click of a button, you get all details on aspecific optimization
    - Based on a personally create usage profile

c. Fix problems
    - Points directly to errors
    - Solved all problems: most with a click of the mouse
    - Provide a secure system

d. Configure Live Optimization
    - Distributes resources efficiently
    - Increases the reaction speed of active programs
    - Speed up start up of all programs

e. Turbo Mode
    - Generate maximum peformance for Windows, programs and games
    - Shut down over 70 PC "brakes" that run in the background
    - Allow for visibly smoother working, gaming, and surfing
    - Tuning status
    - Its useful optimization checklist
    - Depicts tuning action that were already out
    - Identifies unused tuning potential


2. Optimize system

a. Reduce system load
    - World innovation: Tune Up Program Deactivator
    - Ensure maximum performance and rejuvenated Windows
    - Prevent your PC from beeing slowed down by those programs you rarely never use
    - Provides you a smart alternative to uninstalling all those programs
    - Gives you complete control over your system load

b. Rating function for programs
    - Provides support targeted to your tuning decissions
    - The star rating system make things easy to understand
    - Evaluates programs based on the experiences of the users

c. Uninstal unneeded programs
    - Provides information on unneeded program
    - Points out of software that hogs up memory
    - Give you more speed on your PC
    - Disable startup programs
    - Reduces PC startup time
    - Removes annoying icons and balloons ffrom the taskbar notification area
    - Maximize performance


3. Perform maintenance task manually

a. Clean registry
    - Keeps errors in Windows and programs to a minimum
    - Displays details on current problems
    - Cleans the registry with just a few click


b. Defragment registry
    - Repairs structural defects
    - Free up unused disk space
    - Effectively prevents less of performance


c. Remove broken shortcuts
    - Create order on your PC
    - Delete orphaned shortcuts and references
    - Avoid error messages when launching shaortcuts

d. Accelerate system startup and shut down
    - Reduces Windows startup and shutdown times
    - Show which programs have negative effect on system startup
    - Optimize system and program setting

e. Defragment hard disk
    - Reduce program loading time
    - Speed up opening and copying of files
    - Allows programs and games to run more smoothly


4. Gain disk space

a. Clean hard disk
    - Finds all unnecessary files and backups
    - Examines unused Windows functions
    - Cleans out unnecessary data with the click of a button

b. Analize memory usage and delete data
    - Discover greedy memory hogs
    - Deletes unnecessary data dead weight
    - Create new, intellegent ordering

c. Securly delete data
    - Delete sensitive data for good
    - Provides three different methods from fast to secure
    - Guarantees maximum privacy


5. Fix problems

a. Check system and fix problems
    - Fixes common Windows problems in a flash
    - Fixes error in displaying desktop icons
    - Safely takes care of changes to the registry

b. Check hard disk for error
    - Finds errors on data media
    - Repair damages or missing files
    - Efectively prevents loss of data
 
d. Display and close running data
    - Precisely shows processor utilization and memary use
    - Provides information on file necessary by active programs
    - Gives you of overview  open process

e. Restore deleted files
    - Restore deleted files
    - Saves data given up for lost
    - Also works with USB sticks and memory cards

f. Show system information
    - Shows all details on hardware and software
    - Gives an overview of all computer resources
    - Provides information about  the entire system, fast and easily


6. Custumize Windows

a. Change Windows appearance
    - Improve the appearance of your Windows interface with Tune Up Styler
    - Replace all visual elements effortlessly and safely
    - Provides free design template downloads

b. Modify Windows setting
    - Affect over 400 Windows setting
    - Explain each setting clearly and understandly
    - Save you having to make risky changes to the registry


7. Overview of all function

a. Show Optimization Report
    - Clearly show how many PC problems were already fixed
    - Gives you an overview of performance optimizations 
    - Include results from the last 7 days, 30 days and from when Tune Up Utilities 2011 was first installed

b. Check for updates
    - Always keep Tune Up 2011 up to date
    - Guarantees up to date help through constant enhancement
    - Provide free update to download

c. Edit registry
    - Simplyfies registry editing for PC professionals
    - Saves time to thanks to the bookmark and search function
    - Allows you to undo changes ( via Tune Up Rescue Center )

      Those all of the builder said as its product to the users, here i only share to everyone who wants to know what its can do to make your system runs normaly or event faster and better than before. Try this first so you can say its useful...for everything affect to your system is your own risk. But you'll never know if you do not try and believe me its 100% works safely if you read first the explaination on it task.


Wassalamualaikum warahmatullaahi wabarakatuh

Arek NGAJUM IsoIso Ae

Friday, August 19, 2011

How To Burning ISO File On Windows 7

      Basically how to burn files with CD burning programs is the same, there are many programs that can be used to burn a file into a CD or DVD. As an example of common and widely used in general is NERO, Power ISO, Ashampoo Burning Studio etc.
      But this time i will share how to burn ISO files onto a CD using Power ISO on Windows 7. I prefer to use the program because of its simple interface and easy to understand. Before you Burn the ISO files into a CD or DVD, first prepare the ISO files from the downloads that had previously been done. However because the file is still in some parts of the file extention RAR then we must unite those files first.
The way is very easy, blocks all ISO RAR files then right click and select 'Extract Here' see the image

Note: the new files that emerge from the last extract, make a new folder and name the folder 'XPSP3' or anything what's up your will power. After that COPY and PASTE the new file had to extract the folder and do to the file into the folder 'XPSP3'

Pay attention!! do not delete ISO RAR ( Windows XP Professional SP3 Integrated March 2011 SATA) and let it mix with all the file extracted. When finished exit and close the folder.
Now open Power ISO program to start the actual burn an ISO file. I hope you are using CD-RW just to avoid wasting CD's when errors occur in the process burning it.
1. On the main menu of Power ISO click on 'Open'
2. Find the folder where you store your windows xp iso file that was last perform.
    Previously to the new dialog box that appears on the next to 'File Name' change to 'All Files'. Scroll the mouse down and at the very buttom click the option 'ALL Files' then navigate to the folder where the ISO file 'XPSP3' save it.

Pay attention!! select ISO file is still in RAR form only (Windows XP Professional SP3 Integrated March 2011 SATA.rar), then click 'Open' button. So automatically all the files in the folder 'XPSP3' will be extracted into the program Power ISO and you can see on the left below that the file is 'Bootable Image' or actually an ISO file which you can boot via CD-ROM drive in your system BIOS.
After all files are listed as in the example image, click 'Burn' button. After that a new dialog window will appear.
Note: if you use a CD-RW see on the box 'Burning Parameter' in the 'Burning Speed' change of the value of Maximum to 10X(1765KB/s). Because when kept at the 'Maximum' value to make the result of using CD-RW burning failed. Then click 'Burn' button on it window.

So easy and simple steps to burn an ISO file using the program Power ISO  is a user friendly. I hope to give something that benefits us all. For those who do not have Power ISO download it HERE.
For all the attention i would like to thank you profusely.

Wassalamualaikum warahmatullaahi wabarakatuh


Arek NGAJUM IsoIso Ae

Windows XP Professional SP3 ISO

Windows XP Professional SP 3 Integrated March 2011 SATA total size 600 MB.
Installer XP ini adalah dari versi original Micrsoft Windows XP Professional SP 3 iso. Yang berbeda adalah didalamnya telah termasuk juga versi update maret 2011 yang disertai driver SATA dan Internet Explore 8. Pada saat instalasi tidak diperlukan lagi pengisian serial number karena telah dimasukkan dalam program instalasi sehingga akan secara otomatis melakukannya sendiri.
Ada beberapa fitur yang dihilangkan dalam installer ini seperti : Windows messenger, MSN Explorer dan Internet Explore 6 yang telah di upgrade ke IE 8. File ISO ini terbagi kedalam beberapa bagian file RAR untuk memudahkan mendownloadnya dengan sasaran para pendownload yang tidak memiliki akun premium pada situs tempat downloadnya. Namun jangan kawatir karena walaupun di kategorikan sebagai regular downloader kita dapat memperoleh kecepatan download yang mencapai rata-rata 110 Kb/s dengan hanya bermodal Speedy paket Socialia, bayangkan betapa baik hatinya. Ini telah saya buktikan sendiri dan oleh karna itulah saya buat postingan mengenai XP Pro SP 3 ini.
Setelah semua file RAR nya satu persatu terdownload block ke empat file tersebut, kemudian klik kanan lalu pilih 'Extract Here'. Kemudian akan muncul beberapa file baru termasuk cara instalasi dan disertakan pula program untuk membakar keping CD. Untuk file RAR nya yang baru dari hasil ektrak ke empat file tersebut adalah 'Windows XP Professional SP 3 Integrated March 2011 SATA'.
Buatkan folder baru untuk file tersebut dan beri nama folder baru tersebut 'XPSP3' atau sesuka hati anda agar mudah mencari folder tersebut. Setelah folder dibuat COPAS file RAR nya kedalam folder 'XPSP3', setelah itu ekstrak file tersebut dalam folder 'XPSP3'. Kemudian akan muncul semua file ISO yang sesungguhnya seperti gb berikut.

Berikut ini adalah link downloadnya, untuk membuka file download masukkan terlebih dulu passwordnya:

Password : freesoftwarepc.biz

Untuk cara membakar file ISO nya kedalam keping CD pada windows 7 silakan anda baca postingan HOW TO BURNING ISO FILE on Windows 7.

Demikian yang bisa saya bagikan pada kesempatan ini semoga bermanfaat bagi kita semua, terima kasih
Wassalamualaikum warahmatullaahi wabarakatuh

Arek NGAJUM IsoIso Ae 

Monday, August 15, 2011

K810i blank solution

      At this post i will share how to solve the hang problem happens on the handset the Sony Ericsson family of series K, in the case occuered in the type of mobile phone K810i.
Need to be use in this occasion is very common is owned and in use by the new phone technician like me. Hopefully what describe can provide useful benefits for fellow NEWBIE.
      Prepare a Flasher Box UFS Tornado already pinned HWK Original module there in or you can use both N-Box and UFS Micro that ready built in HWK module on sale.
     Firmware for Sony Ericsson K810i CID 53 or corresponding result boot UFS ( you can download the firmware from the support if the file doesn't exist )

Step :

1. Connect the UFS to the computer
2. Double click the icon SeDBx
3. Connect the phone to the UFS box
4. Simply click the Boot button to know the type and firmware on mobile phone
5. After you click the Boot button will be automatically charged the phone type, also note on the message phone info box there is to know the firmware version that running on phone system
6. Fill all the necessary files to the K810i flashing to the box Flash Image Files
7. After all the data flash file have been loaded correctly click the Flash button
8. Wait for the flashing process goes to completion ( the time it takes a little bit long )
9. After all do the stage Finishing

      Once all is done do testing on the handset to prevent complaints from consumers.
Turn the handset by entering the simcard and its external store room ( micro stick ). Test the handset to make calls, send and received message, test the camera and all of the feature standart factory applications. Make sure all have been working with normaly so that you do not have to bother your costumer to return to face new problems after flashing.

      So that i can share for fellow on this opportunity, hopefuly all of which i have describe above can help colleagues and give useful benefits. Thank you verymuch

     Brand New Release v1.1101 for SETool   Download Here

Thank you for all the readers to visiting this blog.

Wednesday, August 10, 2011

Solusi K810i Blank

      Assalamualaikum warahmatullaahi wabarakatuh,
    
      Selamat menjalankan ibadah puasa di bulan suci ramadhan untuk semua rekan yang menjalankan nya di bulan yang suci dan penuh rahmat ini. Semoga semua amal dan ibadah diberi balasan pahala yang berlimpah dari sang Khaliq.
Pada kesempatan posting kali ini saya akan membagi cara untuk memecahkan problem HANG yang terjadi pada handset Sony Ericsson dari keluarga seri K. Pada kasus ini terjadi di ponsel jenis K810i.
Keperluan yang akan di gunakan pada kesempatan ini sangat umum di miliki dan di pergunakan oleh para teknisi NEWBIE seperti saya. Semoga apa yang saya jabarkan ini dapat memberi manfaat yang berguna bagi rekan-rekan sesama NEWBIE.

      Siapkan Box Flasher UFS Tornado 3 yang sudah tersemat HWK ori didalamnya
      Firmware Sony Ericsson K810i CID53 atau yang sesuai hasil Boot UFS (bisa donlot dari support )

Langkah kerja:
1. Hubungkan UFS ke Kompu
2. Klik ganda icon SeDBx
3. Hubungkan ponsel ke box UFS
4. Langsung saja klik Boot untuk mengetahui type dan firmware pada ponsel ( lihat Gb )


5. Setelah anda klik Boot akan secara otomatis type ponsel terisi, perhatikan juga pada kotak pesan yang ada untuk mengetahui versi firmware yang berjalan pada system ponsel
6. Isi semua file yang diperlukan untuk proses flashing K810i ke kotak Flash Image Files


7. Setelah semua data flash files telah terisi dengan benar klik tombol Flash
8. Tunggu proses Flashing yang berjalan sampai selesai ( waktu yang dibutuhkan sedikit agak lama )


9. Setelah selesai proses Flashing K810i akan muncul pesan seperti Gb di bawah ini


10. Dengan munculnya pesan tersebut selesai pula tugas Flashing K810i
11. Selanjutnya lakukan tahap Finishing

      Setelah semua selesai dijalankan, lakukan pengetesan pada handset untuk mencegah komplain dari konsumen.
Hidupkan handset dengan memasukkan simcard dan ruang simpan eksternal nya, uji handset untuk melakukan panggilan, kirim sms dan terima, uji kamera dan semua fitur aplikasi standar pabriknya. Pastikan semua telah bekerja dengan normal sehingga anda tidak perlu repot menghadapi kembalinya costumer anda untuk masalah baru setelah proses Flashing.
      Demikianlah yang dapat saya bagikan untuk rekan semua di kesempatan kali ini, semoga semua yang telah saya jelaskan di atas dapat membantu rekan-rekan dan memberi manfaat yang berguna.

      HOT FOR SETOOL brand new release V 1.1101 DOWNLOAD HERE


GET EVERY THING EASIER WITH Arek ngajum IsoIso Ae


wassalamualaikum warahmatulaahi wabarakatuuh 

Terima kasih:

Allah swt
Muhammad saw
ATS Communication
SCPGSM
2d Computer
Deddy Kusmayadi
LPTTI Jakarta
GSM Forum
Dhaka mobile
Djawir
Symbian Tech
All People read this meanningless blog, thank you verymuch